Showing posts with label Dessert. Show all posts

Saturday, September 13, 2008

Um Ali

OLYMPUS DIGITAL CAMERA

Um Ali is a traditional Arabic dessert dish and is very very rich made almost on every special occasion. Its basically a sort of bread pudding and is one of my all time favourite desserts (and being such a huge food lover categorizing something as my favourite is a big deal!!).

Um Ali translates to Ali's mother (which Ali - that's yet to be discovered..). Despite this dish being extremely..extremely.. unbelievably delicious and easy to make, restaurants over here rarely get it right - something always seems to be off, only at times have I tasted one that was just perfect!

So finely I decided how unclever of me .. here I am baking all sorts of fancy stuff and the one thing that I absolutely am in love with I have NEVER made or even considered making!

For the recipe I went to the one person that can totally kick Martha Stewart a$$ (comment not meant to be mean spirited) - My aunt! I got the recipe made some amendments and voila - Um Ali as it should be! :D

Um Ali

  • Ingredients:

1) 250g Puff Pastry

2) 1/2 cup raisins and dates (chopped and seeded)

3) 1/2 cup coarsely chopped of your favorite nuts (I used pistachios and almonds)

4) ½ cup sugar

5) 1 Tablespoon rose water

6) 1 teaspoon vanilla extract

7) 3  cups whole milk

8) 1/2 cup heavy cream

§ Directions:

1) Preheat the oven to 350F. Lightly butter a 1-qt (2L) baking dish.

2) place the puff pastry sheets in the oven for around 15 minutes until golden brown. Remove from the oven and let cool so you can handle them with your hands. Break the puff pastry into small squares and arrange half the pastry in the buttered baking dish sprinkle with chopped dates and raisons and nuts. Do the same for the remaining half and set aside.

3) Bring the milk and sugar to a boil, whisking occasionally. Whisk in the rose water and vanilla extract. Pour the mixture over the puff pastry. making sure everything is covered.

4) Top with heavy cream and bake for 20 - 25 minutes until the top is golden brown.

5) Remove from oven and let sit for 10 minutes,garnish with chopped nuts. Serve warm.

Tuesday, September 9, 2008

Deep fried and smothered in chocolate!

OLYMPUS DIGITAL CAMERA

Ever since I saw  the post at joy the bakers blog regarding doughnuts, I've had an urge to make them. So a couple of days ago I went to her post to get the recipe but found out that The dough had to sit for around 8 hours as it had yeast and I was in no mood to wait 8 hours - I googled quick and easy doughnuts and ended up with this recipe.

Before I initiate my ramblings view on these cuties, I have to tell you about the title of this post - deep fried and smothered in chocolate, does it ring a bell? no? how about when I say its from a movie with a green ogre? well okay maybe I'm the only person who has watched shrek trilogy till all the lyrics, lines and scenes are embedded in my head! So the evil fairy godmother says this in the 2nd movie right after shrek, donkey and cat wreck her factory! And I've always wanted to use this line - and now I have! Thank you.

Okay so when you eat these doughnut balls ( that's what I made) don't be thinking about dunkin' doughnuts , alright?! Moving on to the positive - these are not your typical doughnuts (i.e. light and airy) but they are more like cake doughnuts (which I am a big fan of by the way)!And they can certainly, definitely fix any doughnut craving  instantly! Moreover if you have kids, you will be making these regularly ( My little bro he's 8yrs old loved them! Totally Off topic: Today was his first day in fourth grade he looked sooo adorable in his combed out hair and neatly pressed uniform! I should have taken a picture!!)

Cake Doughnuts

  • Ingredients:

1) ¼ cup Buttermilk

2) 2 tablespoons shortening

3) 1/2 cup white sugar

4) 1 egg

5) 1/2 teaspoon vanilla extract

6) 2 cups sifted all-purpose flour

7) 1/2 teaspoon baking soda

8) 1/4 teaspoon salt

9) 1 quart oil for deep frying

10) 1/2 cup confectioners' sugar for dusting

  • Directions:

1) In a medium bowl, cream together the shortening and sugar until smooth. Beat in the egg and vanilla until well blended. Sift together the flour, baking soda, and salt; stir into the sugar mixture alternating with the vinegar and milk. Roll dough out on a floured surface to 1/3 inch thickness. Cut into doughnuts using a donut cutter. Let stand for about 10 minutes.

3) Heat the oil in a large deep skillet to 375 degrees F (190 degrees C). Fry doughnuts in the hot oil until golden, turning over once. Drain on paper towels. Dust with confectioners' sugar while they are still warm, and serve immediately. (I dipped mine in chocolate icing and put blue sprinkiles on them!)

OLYMPUS DIGITAL CAMERA

Monday, September 8, 2008

Chocolate Pistachio Biscotti - 2 go!

OLYMPUS DIGITAL CAMERA


So let me start by enlightening my dear readers with the ' 2 go ' next to the title of this post. Basically I made these Oh my gawd delicious biscotti to take with me in an airtight container to university. Weird - I know, but since I don't really do store bought cookies I thought this will be a good alternative - till it lasts.

The recipe adapted from www.joyofbaking.com actually called for hazelnuts but my nut of the moment has been pistachio lately so I opted for them instead.

Chocolate Pistachio Biscotti

  • Ingredients:

1) 4 ounces (125 grams) semisweet or bittersweet chocolate, coarsely chopped

2) 1 cup (215 grams) firmly packed light brown sugar

3) 1 3/4 (250 grams) cups all-purpose flour

4) 1/3 cup (30 grams) unsweetened cocoa, preferably Dutch-processed

5) 1 tablespoon (4 grams) instant espresso powder

6) 1 teaspoon (5 grams) baking soda

7) 1/4 teaspoon salt

8) 3 large eggs

9) 1 1/2 teaspoons (6 grams) pure vanilla extract

10) 1 cup (150 grams) Pistachios, toasted.

  • Directions:

1) Preheat oven to 350 degrees F (180 degrees C). To toast Pistachios: spread on a baking sheet and bake for 15 minutes.Cool. Set aside while you prepare the dough.

2) Reduce temperature of oven to 300 degree F (150 degrees C). Line a large baking sheet with parchment paper.

3) In a food processor fitted with a metal blade, combine the coarsely chopped chocolate and brown sugar and process until the chocolate is very fine; set aside.

4) Sift or whisk together the flour, cocoa, espresso powder, baking soda and salt into a bowl; set aside. In the bowl of your electric mixer combine the eggs and vanilla extract and beat to blend, about 30 seconds. On low speed mix in the chocolate/sugar and flour mixtures until a stiff dough forms, adding the pistachios about half way through mixing.

5) Divide the dough in half. Transfer to the baking sheet and drop the dough in the shape of a log using spatula , spacing them well apart (width-wise on the pan), and pat to even the shapes. Bake until almost firm to the touch, about 35 - 40 minutes (logs will spread during baking). Remove from the oven, place on wire rack, and let cool for 10 minutes.

6) Using a long spatula transfer the logs to a cutting board. Using a serrated knife cut the dough into slices 3/4 inch (2 cm) thick on the diagonal. Arrange the slices cut-side down on the baking sheet. Bake 15 minutes. Turn the slices over and bake until crisp and dry, about 15 minutes longer. Remove from oven and let cool on wire rack.

OLYMPUS DIGITAL CAMERA

Wednesday, September 3, 2008

Good Ol'

OLYMPUS DIGITAL CAMERA

I'm sure anyone reading this will agree that neutella is one of those things that you just cant got wrong with! Its chocolate and hazelnut and apparently tons of sugar thus making it highly addictive!

And any goodies made with this delicacy in it will some how or the other turn it to be incredibly delicious! And when I made this neutella frozen pie - I was Sooo not disappointed! :D

I made this deliciousness after my dad requested a cheesecake or something similar since for the past few weeks I haven't made any fancy stuff, last week I made those evil.. EVIL brownies. And then my aunt made lots and lots of plain ol' cupcakes, and my dad well he likes his cheesecake!

Anyway something off topic, most of you may not be knowing this, but this month is a very special and holy month, its Ramadan (Involves fasting - and breaking the fast with lots and I mean LOTS of special deep fried dishes, but me well I'm a very good girl as I've been sticking with dates and fruits)!

OLYMPUS DIGITAL CAMERA

The recipe is adapted from Icebox pies by Lauren Chattman

Gianduia Pie

§ Ingredients:

Crust

1) 20 Fudge Wafer Bar Cookies

2) 1/2 cup hazelnuts, toasted and skinned

3) 1/4 cup unsalted butter, melted and cooled

4) 1 tablespoon sugar

5) 1/8 teaspoon salt

6) 1/2 teaspoon pure vanilla extract

Filling

1) 3/4 cup hazelnuts, toasted and skinned

2) 1 1/2 cup heavy cream, chilled

3) 1 teaspoon pure vanilla extract

4) 1 13 ounce jar of Nutella

§ Directions:

1) Preheat the oven 350°F. Place all of hazelnuts (1 1/4 cup) on a baking sheet. Bake for 10 minutes until they are fragrant.

2) Place the nuts on a clean kitchen towel and let cool for 10 to 15 minutes. Once cool, rub the nuts with the towel to remove the skin. A little skin won't hurt but try to remove as much as possible.

3) Make the crust: place the nuts and cookies in a food processor and grind finely. Combine the crumb and nut mixture, butter, sugar, salt, and vanilla in a medium size mixing bowl and stir until the crumb and nut mixture is moistened

4) Press the mixture evenly across the bottom of a 9-inch loose bottom pan, packing it tightly with your fingertips so it is even and compacted.

5) Bake the crust for 15-20 minutes until edges start to become firm. The crust will become more firm as it cools. Let cool completely before filling. The crust may be wrapped in plastic wrap and frozen for up to 1 month.

6) Make the filling: place 3/4 cup toasted and skinned hazelnuts in a food processor and process until very fine.

7) Combine the cream and vanilla in large mixing bowl. Using an electric mixer, whip the cream until stiff peaks form.

8) Place the Nutella in a medium-size mixing bowl and stir in one quarter of the whipped cream.

9) Gently fold the lightened Nutella mixture back into the remaining whipped cream. Fold in the chopped hazelnuts.

10) Scrape the filling into the prepared pie shell and smooth the top with a rubber spatula. Cover the pie with plastic wrap and refrigerate until the filling is completely set, at least 6 hours and up to 1 day.

OLYMPUS DIGITAL CAMERA

Friday, August 29, 2008

Sinister Brownies

OLYMPUS DIGITAL CAMERA

I saw the recipe for these oh so evil brownies at this wonderful blog called sugar plum. The minute I saw them I had no choice but to  try them out! Here's why, they started haunting me.period. Yes they haunted me in my day dreams at work (pssst.. that's where I discovered the recipe, when I was taking my well earned 10 minute break). They haunted me while I was at my daily 6k jog!

They are evil. They are rich. They are sooo unbearably delicious! You just want to keep 'em coming!

OLYMPUS DIGITAL CAMERA

Some pointless information regarding myself - since I will be going off to university in like 18 days or so ( I'm going to The university of Nottingham - Malaysia campus), I've been really busy accumulating very important necessities - like a french press to make really REALLy REALLLLLY frothy hot chocolate - OMG I'll tell you about that later). Anyway yesterday we got all the food thingies and beautifying equipment (lotion, potions..)! So I'm really happy about that - it makes it all so real! I never thought that my way overprotective parents will ever part with me - ever! But I guess the beautacious 'A' that I got in my A-level economics did the trick! :D

The recipe from sugar plum

Oreo Cream Cheese Swirled Brownies

  • Ingredients:

1) 1/2 cup (1 stick) unsalted butter

2) 3/4 cup granulated sugar

3) 8 ounces (1 package) cream cheese, softened

4) 3/4 cup confectioners' sugar

5) 2 teaspoons vanilla extract

6) 1 cup all purpose flour

7) 1/2 cup unsweetened dark cocoa powder

8) 1/2 teaspoon salt (scant)

9) 2 large eggs

10) 1 1/3 cups coarsely chopped Oreo cookies

  • Directions:

1) Preheat oven to 350 degrees F. Line an 8x8-inch square baking dish with foil; coat foil with cooking spray.

2) Melt the butter in a small saucepan, over medium heat. Whisk in sugar and bring to a boil, whisking frequently; boil 1 minute. Set aside to cool for 5 minutes.

3) In a small mixing bowl, using a mixer on medium speed, beat together cream cheese, confectioners' sugar and vanilla extract, until well combined, about 1 minute.

4) In a medium sized mixing bowl, sift together flour, cocoa powder and salt; whisk until combined.
In a large mixing bowl, whisk together eggs, until combined. Whisk in melted butter-sugar mixture until well combined. Stir in flour mixture until just combined, followed by Oreo cookies.

5) Spread half of brownie batter into baking dish, followed by cream cheese layer; dot the top with remaining brownie batter, and spread evenly, as best as you can. Run a knife through batter to make "swirls".
Bake at 350 degrees F, for 23-25 minutes (I kept mine in the oven for around 35 min because I thought they weren't done - but I should have taken them out earlier - well every body's gatsta learn somewhere)

6) Cool on a wire rack to room temperature before slicing. Lift foil out of baking dish, and slice into 9 bars. For easier slicing, try freezing the brownies for 30-60 minutes. ( I turned them out on a serving platter - BIG mistake! They got stuck to the plate - not stuck stuck, but you get the picture. I recommend you cut them in the pan then remove each beauty separately - you may notice the from the pictures that they are a somewhat disfigured, well this is the reason)
Yield: 9 brownies

OLYMPUS DIGITAL CAMERA

Tuesday, August 26, 2008

Eureka!

OLYMPUS DIGITAL CAMERA

I have good news.

Do you know how every single person on the planet is in search of the perfect chocolate chip cookie?? okay so I haven't discovered the recipe . .yet, but I did find a recipe that hits close to the ultimate cookie!

I have found the recipe for the perfect peanut butter chocolate 'chunk' cookies!

These cookies were soooo right I cant even begin to describe them! The texture was just right they where kinda chewy but not so chewy and the had the perfect crunch (Is that what you call it?!). Not only that but these babies had chocolate CHUNKS instead of your usual mini wannabe's chips. *sighs deeply* Just perfection!

All I know is I will be baking them again!

OLYMPUS DIGITAL CAMERA

The recipe:

Peanut Butter Chocolate Chunk Cookies

Ingredients:

1) 1/2 cup butter

2) 1/2 cup brown sugar

3) 1/2 cup sugar

4) 1 cup peanut butter butter

5) 1 egg

6) 1/2 tsp salt

7) 1/2 tsp vanilla

8) 1/2 tsp baking soda

9) 1 1/2 cups flour

10) 1/2 tsp cinnamon

11) 3/4 cup dark chocolate chunks

Directions:

1) Preheat oven to 180ºC (350ºF).

2) Cream the butter and both sugars. Beat in the peanut butter and egg.

3) Scrape sides of bowl and beat in the salt, baking soda, cinnamon and vanilla. When well blended, add flour and stir until it is blended. Stir in the chocolate chunks (Reserve a few chunks for the chef  - Trust me you'll need them to divert your attention from the dough when shaping it).

4) Shape dough into 1-inch balls (I used my measuring spoons tablespoon to get the same amount) and place on cookie sheets about 5 cm (2 inchs) apart.

5) Flatten balls with the bottom of a flat glass (I used the back of my measuring cups) and bake for 10-12 minutes or until slightly browned around the edges.

6) Get a large glass of milk and enjoy!

Makes about 35 cookies. Store in airtight container.

OLYMPUS DIGITAL CAMERA

Friday, August 22, 2008

M & M Chocolate Cookies - A la Abeer

OLYMPUS DIGITAL CAMERA

Hey ya'll sorry for the lack of updates but things have been REALLY hectic since I started my very first job as umm .. well I do a lot of typing and filing. Anyway, this job has not been all that bad! I found a bookshop near the office and they were selling all kinds of books for the smallest fraction of the original price!! I got tonnes of books - I am in heaven!!
This recipe if adapted from my brand new cooking light cook book. I made quite a few changes but it turned out sooo good and the best part is they are very very light! So the cookies can actually be enjoyed! :D

M&M Chocolate Cookies2
 
M&M Chocolate Cookies
(Adapted from Cooking light: the best of cooking light)
Ingredients:
1- 1 1/4 cups all purpose flour
2- 1/2 tsp baking powder
3- 1/4 tsp salt
4- 5 Tbl Butter, Softened
5- 1/2 cup granulated sugar
6- 1/2 cup packed brown sugar
7- 1 1/2 tsp vanilla extract
8- 1 large egg white
9- 3/4 cups M&M's
Directions:
1- Preheat oven to 350 degrees (180 degrees Fahrenheit)
2- Lightly spoon the flour into dry measuring cups, and level with a knife. Combine the flour, baking powder, and salt, stirring with a whisk.
3- Combine the butter, granulated sugar, and brown sugar in a large bowl; beat with a mixer at medium speed until well blended. Add vanilla extract and egg white; beat one minute. Stir in flour mixture and M&M's.
4- Drop the mixture by level tablespoons 2 inch apart onto baking sheet coated with cooking spray.Place the pans in the freezer for 5 minutes.
5- Bake at 350 degrees for 10 minutes or until cookies are lightly browned. Remove the cookies from the pans, and cool completely on wire racks.

OLYMPUS DIGITAL CAMERA

Yield: 2 dozen cookies; serving size: 1 cookie (yeah right!)

P.S. I just made a date pecan pie! Its baking in the oven as we speak!

OLYMPUS DIGITAL CAMERA

Sunday, August 10, 2008

Marmalade, Figs and buttermilk cake

OLYMPUS DIGITAL CAMERA

Hey there, I made this cake last week, I got the recipe from sass and veracity but made a few changes to suite my pantry..and taste!
This cake turned out to be soo moist and sticky that you can easily pull it of as a pudding rather than a cake!

In the her recipe, she used some fresh and fig preserve as I didn't have any of which at home I opted for a lil change but using marmalade and dried figs (which she used in addition to the fresh figs).

This cake was really delicious, basically its like one of those dishes that ..well does not sound like peanut butter and chocolate but when you taste it , it will totally surprise you, so try it you won't regret it!

Marmalade, figs and buttermilk cake

adapted from sass and veracity

Ingredients:

1) 1 1/2 cup sugar

2) 2 cup all-purpose flour

3) 1 tsp. baking soda

4) 1/2 tsp. salt

5) 1 tsp. ground nutmeg

6) 1 tsp. cinnamon

7) 1/2 tsp. ground allspice

8) 1/2 tsp. ground cloves

9) 1 cup vegetable oil

10) 3 eggs

11) 1 cup buttermilk (I used skimmed buttermilk - tastes the same but its skimmed so :D)

12) 1 TBS. vanilla extract

13) 1 cup marmalade

14) 1/2 cup chopped pecans or walnuts

15) Around 20 chopped dried figs

§ Directions:

1) Combine first 8 ingredients in a large mixing bowl; add oil and eggs, beating well at medium speed with electric mixer.

2) Add buttermilk and vanilla, beating well.
Stir in marmalade,dried figs and pecans or walnuts.

3) Pour batter into a greased and floured 10 inch tube pan.

4) Bake at 350º F. for 1 hour or until wooden pick inserted in center comes out clean.

5) Cool in pan 10 minutes; remove from pan and place on serving platter.

6) Pour buttermilk glaze over cake while both are still warm.

Buttermilk Glaze:

~Ingredients

1) 1 1/2 c. powdered sugar

2) 1/4 c. buttermilk

3) 1 TBS. butter

4) 1 tsp. vanilla extract

~ Directions:

1) Melt 1 TBS. butter in saucepan over low heat, add the buttermilk and the powdered sugar, heat till dissolved, then add 1 teaspoon vanilla extract.

2) If the glaze is to thin or thick add powdered sugar or more buttermilk accordingly until you get the consistency you like.


OLYMPUS DIGITAL CAMERA

Tuesday, August 5, 2008

I scream .. you scream .. we all..

P7220110 

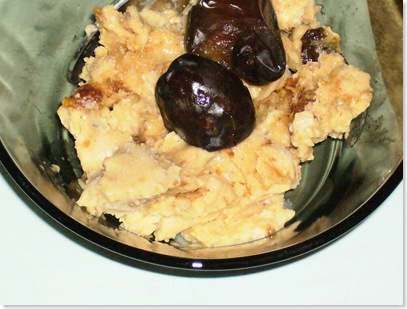
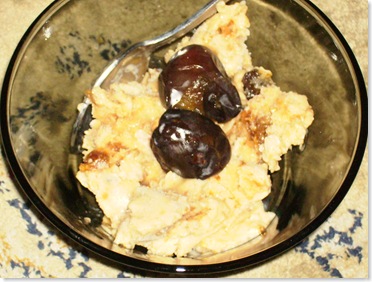
..scream for DATE ICE CREAM!!

Sometime ago I mentioned that I had made the most insanely delicious date ice cream .. well today you get to meet the recipe.

Where I live (Bahrain) you rarely find any cheap fancy fruit like blueberries, blackberries, raspberries and rhubarb. So I have been so envious of all the food blogger's who somehow have unlimited supply to all these berries and have been posting delicious dessert after another consisting of these "fancy fruit" (as I choose to call them).

So now the only fruit that probably grows in Bahrain's painfully hot climate that can destroy the above fancy fruit and every other fruit in a  food competition is - dates.

Period. No argument. Cuz then we will have SERIOUS issues!

Dates are wonderful dried, but fresh dates with cold milk or buttermilk - its what I call heaven.

Not only are they so low in calories but they are extremely .. extremely nutritious.

Here are Some interesting facts about dates:

Dates Nutrition Information.

A 100 gram portion of fresh dates is a premium source of vitamin C and supplies 230 kcal (960 kJ) of energy. They are fat free, cholesterol free, and are a good source of fiber Every 100 gram portion includes Vitamin A -- 5 mcg beta-carotene and 75 mcg lutein + zeaxanthin and Vitamin B-complex total folate - 13 mcg. A single date contains Vitamin B6 -- 0.192 mg. Dates also contain Vitamin A1, B1, B2, B3, B5, C and more than 20 different amino acids, helping us digest and assimilate carbohydrates easier and control blood sugar levels and fatty acids content in our bodies. The selenium lowers the risk of cancer and heart diseases, as well as helps us keep our immune systems healthy. As a single date contains around 23 calories, this very low calorie count and the huge amount of healthy substances in dates make them one of the best nutrition sources for a diet plan menu.

A 100 gram portion of fresh dates is a premium source of vitamin C and supplies 230 kcal (960 kJ) of energy. They are fat free, cholesterol free, and are a good source of fiber Every 100 gram portion includes Vitamin A -- 5 mcg beta-carotene and 75 mcg lutein + zeaxanthin and Vitamin B-complex total folate - 13 mcg. A single date contains Vitamin B6 -- 0.192 mg. Dates also contain Vitamin A1, B1, B2, B3, B5, C and more than 20 different amino acids, helping us digest and assimilate carbohydrates easier and control blood sugar levels and fatty acids content in our bodies. The selenium lowers the risk of cancer and heart diseases, as well as helps us keep our immune systems healthy. As a single date contains around 23 calories, this very low calorie count and the huge amount of healthy substances in dates make them one of the best nutrition sources for a diet plan menu.

Traditional Medicinal Uses.

Dates have a high tannin content and are used medicinally as a detersive (having cleansing power) and astringent in intestinal troubles. As an infusion, decoction, syrup, or paste, dates may be administered for sore throat, colds, bronchial catarrh, and taken to relieve fever and number of other complaints. One traditional belief is that it can counteract alcohol intoxication. The seed powder is also used in some traditional medicines. The roots are used against toothache.

From www.organicfood.com.au

anyway the recipe:

Note: Since dates are very sweet, there is no sugar whatsoever in this recipe! :D

Date Ice Cream

Ingredients:

1) 1 cup dates, seeded and roughly chopped

2) 1 tablespoon powdered gelatin

3) 1 ½ cups evaporated milk, whipped

4) ½ teaspoon cardamom powder

5) 3 tablespoon hot water

Directions:

1) Place dates in a bowl with cardamom powder and mash to incorporate.

2) Put 3 tablespoon hot water in a small heatproof bowl and sprinkle over the gelatin. Place over a pan of gently simmering water and stir until dissolved. Pour on to the dates and mix well.

3) Add the whipped evaporated milk and fold to incorporate. Pour the mixture into a plastic freezer container and freeze until half frozen.

4) Place in a food processor until smooth. Spoon back into container and refreeze. Stir after two hours or so.

Remove the ice cream from the freezer 10 minutes before serving and place in the fridge. Garnish with fresh dates if desired.

P7220108

Monday, July 28, 2008

Devil's Food Cupcakes With Fluffy Peanut Butter Icing!!

Devils Food Cupcakes7

howdy ho! So this past Wednesday I made baklava and I was going to post the pictures but the whole damn thing was gone before I could take any pictures!! Making baklava is dead easy but I had never had the opportunity to make it before since where I live (Bahrain - its an island somewhere in the Arabian gulf) you can find baklava like bread - its THAT common, yet its usually bought during special occasions like parties or Eid. So not many would consider making it, but I wanted to try! It turned out really great and my cousin who had dropped by that day actually compared it to one of the top pastry shops that sell baklava - I was pleased :D

But this post is not about the now gone baklava, its about the low fat devil's food cupcakes with a not so low fat icing!

I got the recipe from foodnetwork, its by Ellie Krieger.

They taste soo good that for you actually forget that they are lower in deadly artery blocking fat and calories! But then you remember and have a second one! :D

Devil's Food Cupcakes

Ingredients:

1) Paper cupcake liners

2) 1/2 cup whole-grain pastry flour

3) 1/2 cup cake flour

4) 1/2 cup natural cocoa

5) 3/4 teaspoon baking soda

6) 1/4 teaspoon salt

7) 1/2 cup reduced-fat sour cream

8) 1/4 cup lowfat buttermilk

9) 2 tablespoons unsalted butter

10) 1/4 cup canola oil

11) 1/2 cup dark brown sugar

12) 1 egg

13) 1 egg white

Directions:

1) Place rack in center of oven and preheat oven to 350 degrees F.

2) Place a cupcake liner into each section of an 8-cupcake tin (My cupcake moulds are smaller so this recipe yielded 10 of 'em). Whisk together flours, cocoa, baking soda and salt in a medium bowl and reserve. Combine sour cream and buttermilk in a small bowl and reserve.

Devils Food Cupcakes2

3) Combine butter, oil and brown sugar in the bowl of a stand mixer and mix on high speed, scraping down sides of bowl, until sugar has dissolved and mixture is light in color, about 1 minute. Add egg and egg white and beat an additional 1 minute. Add 1/3 of flour-cocoa mixture, then 1/3 sour cream buttermilk mixture, mixing well after each addition. Repeat with remaining dry and wet ingredients (I've always read that you should finish with the dry ingredients so that the batter holds together).

4) Distribute batter evenly among 8 (10 in my case) cupcake tins. Bake for 15 to 17 minutes (I baked for 20 min since my oven is psychotic and I never get the perfect result within the stated time) , or until a toothpick inserted into cupcake comes out clean. Let cupcakes cool slightly, transfer to wire racks and cool completely, 10 to15 minutes.

OLYMPUS DIGITAL CAMERA

Don't they look sinister!

Fluffy Peanut Butter Icing

Ingredients:

1) 1/2 cup butter, softened

2) 1 cup creamy peanut butter

3) 3 tablespoons milk, or as needed

4) 2 cups confectioners' sugar

Directions:

Place the butter and peanut butter into a medium bowl, and beat with an electric mixer. Gradually mix in the sugar, and when it starts to get thick, incorporate milk one tablespoon at a time until all of the sugar is mixed in and the frosting is thick and spreadable. Beat for at least 3 minutes for it to get good and fluffy.

Note: I halved the recipe for these cupcakes.OLYMPUS DIGITAL CAMERA

Saturday, July 19, 2008

Mini Molten Lava Cakes - A Martha Recipe Success!


I know that there are many .. manyy bloggers out there who have tried dear Martha's recipes and regretted it since they usually have some missing ingredient or wrong instructions - trust me I've been there! So when I wanted to try a chocolate lava cake and was not able to find one with reasonable amount of ingredients ( some required 6 eggs..yadda yadda) and when i found this recipe on Martha's website I knew that I had to try it. The recipe yields 6 muffin size lava cakes but i decided to make mini ones by baking them in a cupcake pan but if you do that it's important that you reduce the cooking time else you won't get the lavaness - you'll just get a really gooey, fudgy, moist , chocolaty cake!
I served it with vanilla ice cream and powdered sugar. Speaking of ice cream just the other day I was craving date ice cream (where do you get that .. right?) so i decided to make my own and OMG was it good, and I didn't even use an ice cream maker - since i don't own one! I will be posting the recipe sometime in the near future - so stay tuned!
The recipe for the lava cake:
-Ingredients:
1)4 tablespoons unsalted butter, room temperature, plus more for muffin tins
2)1/3 cup granulated sugar, plus more for muffin tins
3)3 large eggs
4)1/3 cup all-purpose flour
5)1/4 teaspoon salt
6)8 ounces bittersweet chocolate, melted
7)Confectioners' sugar, for dusting
8)Whipped Cream , for serving ( I say vanilla Ice cream!!)
- Directions:
1)Preheat oven to 400 degrees. Generously butter 6 cups of a standard muffin tin (or 12 smaller cupcake pan - but again you'll have to reduce the timing). Dust with granulated sugar, and tap out excess. Set aside.
2)In the bowl of an electric mixer fitted with the paddle attachment, cream the butter and granulated sugar until fluffy. Add eggs one at a time, beating well after each addition. With the mixer on low speed, beat in flour and salt until just combined. Beat in chocolate until just combined. Divide batter evenly among prepared muffin cups.
3)Place muffin tin on a baking sheet; bake just until tops of the cakes no longer jiggle when the pan is lightly shaken, 8 to 10 minutes (less for mini ones around 5 -6 minutes). Remove from oven; let stand 10 minutes.

4)To serve, turn out cakes, and place on serving plates, bottom sides up. Dust with confectioners' sugar, and serve with whipped cream (Or vanilla ice cream), if desired (Trust me you will desire it once you break into the yummy warm luscious lava cake and the chocolaty goodness oozes out).

Monday, July 7, 2008

Maple Syrup Creme Brulee


Whenever making use of egg whites I am usually left with nice whole yellowy not so useful egg yolks. This was the case yesterday morning as well. Having watched Sarah Moulten of Sara's Secrets creme brulee recipe just recently, i decided to try making creme brulee for the very VERY first time! Initially I was very fearful of the eggs curdling as I've of it happening whenever I read or watch a Creme Brulee recipe. Fortunately luck (and talent) was on my side and this ill fate did not occur! I also adjusted the recipe to make it low fatter (who knew that was a choice with creme brulee?!?!), instead of using heavy cream i used evaporated milk. Anyway the recipe follows:
 Ingredients:
1) 2 cups evaporated milk(full fat)
2) 1/2 vanilla bean
3) 1 small egg
4) 3 large egg yolks
5) 7 tablespoons Grade B maple syrup
6) 4 tablespoons demarara sugar, for topping
7) 6 (4-ounce) brulee molds

 Directions:
1) Preheat the oven to 325 degrees F.
2) Pour the milk into a non-reactive saucepan and place over medium heat. While the milk is heating, slice the vanilla bean in half lengthwise, using a sharp paring knife. Separate the seeds from the skin by scraping the bean with the knife. Place the seeds and skin in the heating cream. Scald the milk by heating it until bubbles start to form around the edge of the pan. Remove from the heat.
3) In a large mixing bowl, whisk together the whole egg, egg yolks, and maple syrup until well blended. Continue to whisk while slowly pouring the hot milk into the egg mixture and whisk until the mixture is smooth and homogenous in color. Pour the mixture through a fine-mesh sieve to remove the vanilla bean pieces and overcooked eggs. Your next step will be made easier if you strain the mixture into a large measuring cup with a spout.
4) Place the molds on a baking sheet with 1-inch-high sides. Fill the molds half-full with the custard and set the sheet in the oven (it’s much easier to transfer the sheet with the molds only half-full).
5) Now, finish filling the molds to the top. It is important to fill the molds to the top, as the custard will lose volume as it bakes. Traditionally, creme brulee is baked in a hot water bath to insulate the custard from the direct heat of the oven and to keep the eggs from cooking too fast, which would cause them to separate. Using hot water from the tap, pour enough water into the baking sheet to reach halfway up the sides of the molds. If you are using a convection oven, however, a water bath is not needed because the even circulation of the air insulates the custard from the direct heat.
6) In either case, baking time is approximately the same, about 40 minutes. When baked correctly, the custard should tremble slightly when gently shaken. If you detect any liquid under the skin, the custard is under baked. Put them back in the oven and shake them every 5 minutes or so until they are ready.
7) Remove the molds from the water bath and place on a cooling rack for 30 minutes. Then refrigerate for 2 hours (or for to 3 days) before serving; the custards will finish setting in the refrigerator. Let the water bath cool before removing it from the oven.
8) Preheat the broiler.
9) If condensation occurs during chilling, carefully blot with a paper towel to remove moisture. Place the molds on a clean baking sheet. Sprinkle 2 teaspoons of the sugar over the top of the custards. It is important to spread the sugar evenly; if it is too thick or too thin in places, the caramelization will not be even across the top. When the broiler is hot, place the sheet about 4 inches under the broiler and broil until the sugar is caramelized. Keep a close eye on the creme brulee during broiling. They are finished when they are light brown. Place each mold on a small dessert plate and serve immediately.

Saturday, July 5, 2008

Caramelized Banana Crumble Top Pie - My Near Disaster!!


With the cheesecake nearly gone i decided to make a caramelized banana crumble top pie! I got the recipe from Saturday Kitchen (On BBC Food). It seemed quite simple until I started making it and everything started falling apart!
Firstly, the crust: I don't know why but it was just too soft, it was close to looking like a batter - Close. Even after putting it in the freezer for half an hour rolling it proved impossible - literally! it was waayyyy to sticky! So instead i put it in the pie dish and pressed it lightly with my fingers so that it covered the whole thing then i put it in the freezer for another half an hour.
Secondly; the filling: Caramelizing sugar has always been a challenge and this was only my second attempt at it - my first attempt .. well that's another story ( It involves burnt tongue, fingers and my lips looking like Angelina's! - Don't ask!). So anyway the sugar caramelized fine it was only when I added the butter, cream and tried coating the sliced banana's with the mixture did everything backfire! The sugar went all hard and stuck to the bottom. Although now that I think about it my mistakes are obvious - remove pan from heat when stirring in banana's this will definitely save you from wanting to stab yourself with the tongs (that are being used to handle the le banane).
So anyway the end result was OMG!! The pie tasted exellento and went marvelously with the chocolate sauce! My advice stick to the recipe trust the pie is totallly worth it!
Caramelized banana crumble top pie:
- Ingredients:
For the pastry:
1) 250g/9oz plain flour
2) 100g/3½oz unsalted butter
3) 100g/3½oz icing sugar
4) 2 medium eggs
5) 1 vanilla pod - cut and split or a teaspoon of vanilla extract
For the crumble:
1) 2 1/2 tablespoon /35g/1oz plain flour
2) 2 1/2 tablespoon /35g/1oz caster sugar
3) pinch of cinnamon
For the filling:
1) 5 bananas, sliced li
2) 12 tablespoons /180g/6oz butter
3) 12 tablespoons / 180g/6oz sugar
4) 6 tbsp cream
For the chocolate sauce:
1) 100ml/3½fl oz cream
2) 50g/1¾oz chocolate
- Directions:
1) Rub flour and butter together, add icing sugar.
2) Beat the eggs and vanilla seeds or extract and add to mix. Bring mix together and wrap in cling film. Put in freezer for half an hour.
3) After resting, roll out the pastry, line 20cm/8in tart ring, return to freezer for another half an hour then blind bake at 180C/360F/Gas 4 for 15-20 minutes.
4) In a hot non-stick pan, add the sugar and take to a caramel stage, add butter and allow to melt.
5) Add sliced bananas, add cream and coat bananas all over. Put mix in tart case (After removing from heat)!!.
6) Rub flour, castor sugar and cinnamon together and sprinkle on top.
7) Bake for ten minutes until golden.
8) Heat cream, take off heat and add chocolate.
9) Mix until chocolate melts.
10) Slice tart and drizzle the chocolate sauce around it.

Enjoy!

Friday, July 4, 2008

Triple Chocolate Cheesecake - O Nigella!


I saw this recipe of Nigella's sometime ago and it has been on my mind since then. So I finally I got an opportunity to make this oh so easy yet unbelievable delicious triple chocolate cheesecake. I mean its got chocolate three times I highly doubt it could taste bad. My dad - who has got incredible taste and i would blindly trust on any food related judgment - couldn't stop raving about the cake!
And since this was my first cheesecake ever - I couldn't be happier! :D
Honestly speaking, I did do one mistake, the recipe calls for 3/4 cups of sugar for the filling and I put only a half a cup and forgot the 1/4 cup, so it did taste a little less sweet and I'm sure the forgotten 1/4 cup would have made it le perfect!
Moral: don't accidentally 'under do' the sugar, or anything else as a matter of fact since this recipe honestly cannot be improved - although now that i think about it, a thicker crust would have been better as I'm more of a crust person. But Cheesecakes aren't supposed to be very crusty anyway - although I'm sure Nigella won't mind some small alterations *wink..wink*!
Okay so the recipe is as follows:
Triple Chocolate Cheesecake:
 Ingredients:
Cheesecake base:
1) 1 1/3 cups graham cracker crumbs
2) 1/2 stick butter
3) 1 tablespoon cocoa
Cheesecake filling:
1) 6 ounces bittersweet or semisweet chocolate, chopped small
2) 2 1/2 cups cream cheese
3) 3/4 cup superfine sugar
4) 1 tablespoon custard powder
5) 3 large eggs
6) 3 large egg yolks
7) 2/3 cup sour cream
8) 1/2 teaspoon cocoa, dissolved in 1 tablespoon hot water
Sauce:
1) 3 ounces bittersweet chocolate, finely chopped
2) 1/2 cup heavy cream
3) 1 teaspoon dark corn syrup
Special equipment: 9-inch springform pan

 Directions:
1) Preheat the oven to 350 degrees F.
2) To make the base, process the graham crackers to make rough crumbs and then add the butter and cocoa. Process again until it makes damp, clumping crumbs and then tip them into the pan. Press the crumbs into the bottom of the pan to make an even base and put into the freezer while you make the filling.
3) Put a kettle on to boil.
4) Melt the chocolate either in a microwave or double boiler, and set aside to cool slightly.
5) Beat the cream cheese to soften it, then add the sugar and custard power, beating again to combine. Beat in the whole eggs and then the yolks, and the sour cream. Finally add the cocoa dissolved in hot water and melted chocolate and mix to a smooth batter.
6) Take the springform tin out of the freezer and line the outside of the tin with a good layer of cling wrap, and then another layer of strong foil over that. This will protect it from the water bath.
7) Sit the springform tin in a roasting pan and pour in the cheesecake filling. Fill the roasting pan with just boiled water to come about half way up the cake tin and bake in the oven for 45 minutes to 1 hour. The top of the cheesecake should be set, but the underneath should still have a wobble to it.
8) Peel away the foil and cling film wrapping and sit the cheesecake in its tin on a rack to cool. Put in the refrigerator once it is no longer hot, and leave to set, covered with plastic overnight. Let it lose its chill before unspringing the cheesecake to serve.
To make the chocolate sauce: very gently melt the chopped chocolate, cream and syrup. When the chocolate has nearly melted, take off the heat and whisk it to a smooth sauce. Let it cool a little, and pour it over the chocolate cheesecake on its serving plate.

Tuesday, July 1, 2008

Mocha Chocolate Cake - For my Lovely Mother's Birthday


Hello everyone, i hadn't baked anything in a couple of days as i was waiting to bake for my mom's birthday. Originally i had planned to bake an opera cake but it turned out that the opera cake would be too ginormous for the family so i ended up making a mocha chocolate cake. The recipe for the cake is from Dorie Greenspan book, but i got the recipe from a blog as i don't have the book yet - unfortunate i know! The original recipe has different icing but i opted to make a chocolate mocha fudge icing (adapted from different sources), Which turned out nothing short of heavenly! The cakes texture was so soft and airy as it had oil and buttermilk, so the cake ain't that heavy on your sides either! I made the cake yesterday morning at the crack of dawn (literally - since i wake up early to do pilates anyway!) and hid it in me aunts room so that my mom doesn't spot it but I'm guessing she figured it out since the house was smelling gloriously of chocolate and coffee. But she pretended not to know anything about it! So this morning I've been up early (for pilates) and to put the icing on my lovely. I also made pancakes and banana smoothie for my moms breakfast "buffet". I didn't have much time for the pancakes so i just went with Bisquick - but i come across a recipe for whole grain pancakes which i intend to try out later and if it turns out to be a success I'll definitely post it!

The naked cake (ie before frosting):

Anyway enough blabbing .. the recipe:

Mocha Chocolate Cake

 Ingredients:

1)1-3/4 cups all-purpose flour

2)2 cups sugar

3)3/4 cup good cocoa powder

4)2 tsp baking soda

5)1 tsp baking powder

6)1 tsp kosher salt

7)1 cup buttermilk, shaken

8)1/2 cup vegetable oil

9)2 extra-large eggs, at room temperature

10)1 tsp pure vanilla extract

11)1 cup freshly brewed hot coffee


Directions:

1)Preheat the oven to 350 deg. F. Butter two 9-inch round cake pans, line them with parchment paper, then butter and flour them.

2)Sift flour, sugar, cocoa, baking soda, baking powder, and salt into the bowl of an electric mixer. In another bowl, combine the buttermilk, oil, eggs, and vanilla. With the mixer on low speed, slowly add the wet ingredients to the dry. With the mixer still on low, add the coffee and stir just to combine, scraping the bottom of the bowl with a rubber spatula. Pour the batter into the prepared pans and bake for 35 to 40 minutes, until a cake tester comes out clean.

3)Set the pans on a cooling rack and cool in the pans for 30 minutes. Loosen the edges by running a knife around the inside, if needed, turn the cake onto a plate, peel the parchment paper off the bottom, then turn the cake onto a cooling rack to finish cooling.

4)When the layers are completely cooled, place one layer, flat side up, on a flat plate or cake pedestal. With a knife or offset spatula, spread the top with frosting. Place the second layer on top, rounded side up, and spread the frosting evenly on the top and sides of the cake.

Mocha Chocolate Icing: ( i cut the recipe in half)
12 oz Semi Sweet chocolate chips.
8 oz sour cream
1/2 cup butter
4 1/2 cups sifted icing sugar
2 teaspoon coffee

Melt the chocolate and butter in a small saucepan over low heat. Remove from heat and let cool for 10 minutes stir in sour cream and sifted powdered sugar. Enjoy!