Monday, July 28, 2008

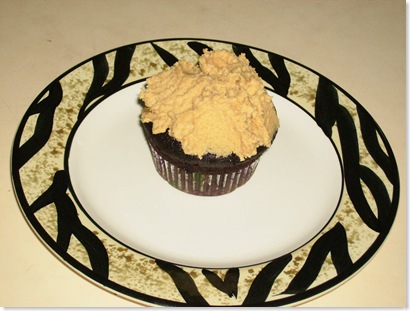
Devil's Food Cupcakes With Fluffy Peanut Butter Icing!!

Devils Food Cupcakes7

howdy ho! So this past Wednesday I made baklava and I was going to post the pictures but the whole damn thing was gone before I could take any pictures!! Making baklava is dead easy but I had never had the opportunity to make it before since where I live (Bahrain - its an island somewhere in the Arabian gulf) you can find baklava like bread - its THAT common, yet its usually bought during special occasions like parties or Eid. So not many would consider making it, but I wanted to try! It turned out really great and my cousin who had dropped by that day actually compared it to one of the top pastry shops that sell baklava - I was pleased :D

But this post is not about the now gone baklava, its about the low fat devil's food cupcakes with a not so low fat icing!

I got the recipe from foodnetwork, its by Ellie Krieger.

They taste soo good that for you actually forget that they are lower in deadly artery blocking fat and calories! But then you remember and have a second one! :D

Devil's Food Cupcakes

Ingredients:

1) Paper cupcake liners

2) 1/2 cup whole-grain pastry flour

3) 1/2 cup cake flour

4) 1/2 cup natural cocoa

5) 3/4 teaspoon baking soda

6) 1/4 teaspoon salt

7) 1/2 cup reduced-fat sour cream

8) 1/4 cup lowfat buttermilk

9) 2 tablespoons unsalted butter

10) 1/4 cup canola oil

11) 1/2 cup dark brown sugar

12) 1 egg

13) 1 egg white

Directions:

1) Place rack in center of oven and preheat oven to 350 degrees F.

2) Place a cupcake liner into each section of an 8-cupcake tin (My cupcake moulds are smaller so this recipe yielded 10 of 'em). Whisk together flours, cocoa, baking soda and salt in a medium bowl and reserve. Combine sour cream and buttermilk in a small bowl and reserve.

Devils Food Cupcakes2

3) Combine butter, oil and brown sugar in the bowl of a stand mixer and mix on high speed, scraping down sides of bowl, until sugar has dissolved and mixture is light in color, about 1 minute. Add egg and egg white and beat an additional 1 minute. Add 1/3 of flour-cocoa mixture, then 1/3 sour cream buttermilk mixture, mixing well after each addition. Repeat with remaining dry and wet ingredients (I've always read that you should finish with the dry ingredients so that the batter holds together).

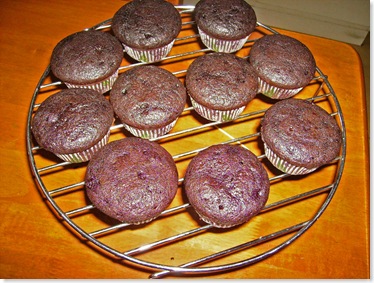
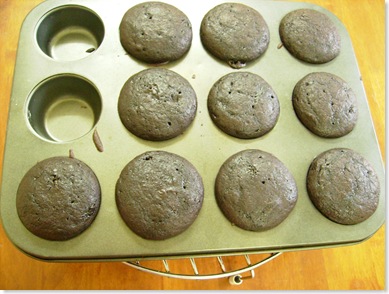
4) Distribute batter evenly among 8 (10 in my case) cupcake tins. Bake for 15 to 17 minutes (I baked for 20 min since my oven is psychotic and I never get the perfect result within the stated time) , or until a toothpick inserted into cupcake comes out clean. Let cupcakes cool slightly, transfer to wire racks and cool completely, 10 to15 minutes.

OLYMPUS DIGITAL CAMERA

Don't they look sinister!

Fluffy Peanut Butter Icing

Ingredients:

1) 1/2 cup butter, softened

2) 1 cup creamy peanut butter

3) 3 tablespoons milk, or as needed

4) 2 cups confectioners' sugar

Directions:

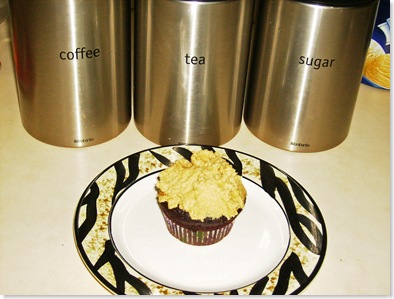
Place the butter and peanut butter into a medium bowl, and beat with an electric mixer. Gradually mix in the sugar, and when it starts to get thick, incorporate milk one tablespoon at a time until all of the sugar is mixed in and the frosting is thick and spreadable. Beat for at least 3 minutes for it to get good and fluffy.
Note: I halved the recipe for these cupcakes.OLYMPUS DIGITAL CAMERA

Monday, July 21, 2008

Chocolate Abstract Meringue Pie - Triumph through tragedy

Technorati Tags: ,,,

OLYMPUS DIGITAL CAMERA

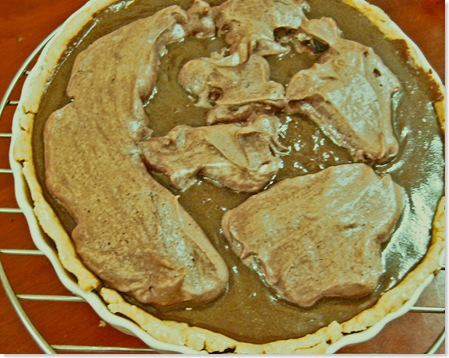
My second biggest challenge in baking has to be meringue! Shocked?! I suppose you might be since meringues are .. well generally not that challenging to make. But Some how while making this pie which was pretty easy all the way through - the meringue got to me! It got to me BIG time! And that was only the beginning! Here's how everything played out yesterday:

14:00 ish - After lunch I started with the crust (Pate Brisse) while my mom was devaining the 10kg shrimps that my dad got!!! ( Any shrimp recipe - send them my way! :P) . So according to the recipe I turned the dough out of the food processor and turned into a disk and cling filmed it and then put it in the freezer for point five hours (Since the refrigerator was giving strong shrimp odors - as is my hair by the way!)

14:10 ish - Went to update my sony walkman mobile phone for my daily jog.

14:30 ish - Removed the dough from the freezer, rolled it out and it started breaking at this point so I picked it with the help of the rolling pin and fitted it in the pie dish with the help of me fingers, then returned it to the freezer so to firm it before blind baking it. At this point I decided to finish the pie after coming back from my jog.

17:30 on the dot - Leave the house with my gear intact ( gear includes: pouch for holding my sony walkman mobile phone, and tissue in case any allergies start to kick in - eew!, and my beloved nikes without which - well i wouldnt be able to jog)

18:30 -- 19:00- return home shower - yada yada - drink three glasses of water , pre heat oven, put patee brisee in the oven , make frothy hot chocolate with my magic whisk (the kind nigella has - I love it!)

19:00 ish - start the filling - everything is going smoothly I'm seriously happy and content and am humming peacefully to myself!

OLYMPUS DIGITAL CAMERA

So eventually the pie gets filled with the chocolate creamy goo - yum yum and then the meringue ( da da da daa.. 'scary music on cue')

I start beating the egg whites till stiff - I'm beating with my electric hand held whisks (which are by some loser brand - a present from my cousin :) )

I'm beating on full speed ..

Then all of a sudden .. you guessed it... the frikin' peace of machinery stops! just like that! It stops working! And at this point i go into phase one of my hysteria where tears are slowly rolling down my cheeks and I'm calling for mommy who rushes to my aid and suggests that I may have over loaded the machine power or something like that!

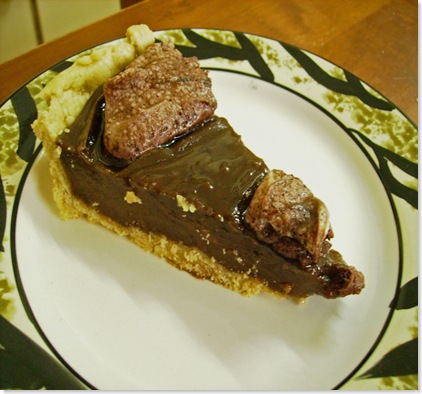
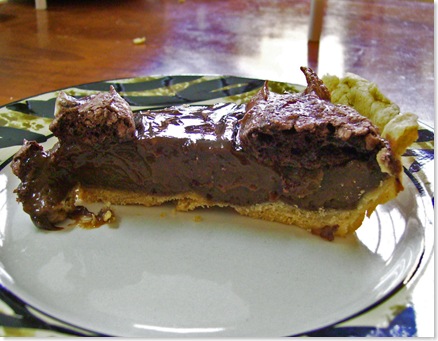
So quickly I get my aunts electric beaters, and start beating away. I add the sugar, the vanilla and cocoa powder (a personal variation) . Then suddenly the whole meringue thingy turns into water!! And by water I don't literally mean water just liquid! So here I start sobbing hysterically! And calling for my aunt (who happens to be way better than martha - trust me! Although sadly she didn't opt to go main stream!). My aunt comes and with one look at the mess suggests that the meringue is now gone and i should move on to a fresh batch of whites. More tragedy follows when I discover we only have one egg in the fridge! So thus instead of a full on meringue thingy I have a Chocolate Abstract Meringue Pie!

OLYMPUS DIGITAL CAMERA

The recipe is of Nigella's you can get it on her website: http://www.nigella.com/recipes/recipe.asp?article=636  - Its called a chocolate cream pie. 

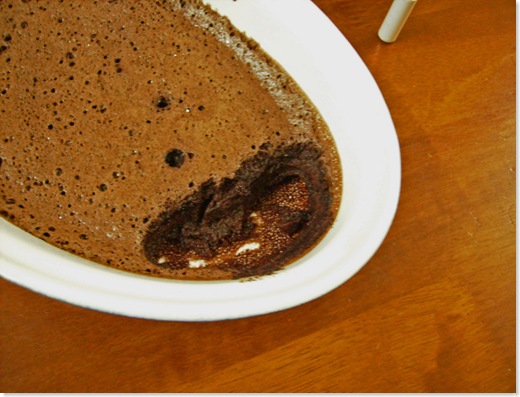
and if you're wondering what happened to the failed meringue - I added the egg yolk from the last egg and baked into - and ended up with a mousse! Hence Triumph through tragedy!

OLYMPUS DIGITAL CAMERA

Saturday, July 19, 2008

Mini Molten Lava Cakes - A Martha Recipe Success!


I know that there are many .. manyy bloggers out there who have tried dear Martha's recipes and regretted it since they usually have some missing ingredient or wrong instructions - trust me I've been there! So when I wanted to try a chocolate lava cake and was not able to find one with reasonable amount of ingredients ( some required 6 eggs..yadda yadda) and when i found this recipe on Martha's website I knew that I had to try it. The recipe yields 6 muffin size lava cakes but i decided to make mini ones by baking them in a cupcake pan but if you do that it's important that you reduce the cooking time else you won't get the lavaness - you'll just get a really gooey, fudgy, moist , chocolaty cake!
I served it with vanilla ice cream and powdered sugar. Speaking of ice cream just the other day I was craving date ice cream (where do you get that .. right?) so i decided to make my own and OMG was it good, and I didn't even use an ice cream maker - since i don't own one! I will be posting the recipe sometime in the near future - so stay tuned!
The recipe for the lava cake:
-Ingredients:
1)4 tablespoons unsalted butter, room temperature, plus more for muffin tins
2)1/3 cup granulated sugar, plus more for muffin tins
3)3 large eggs
4)1/3 cup all-purpose flour
5)1/4 teaspoon salt
6)8 ounces bittersweet chocolate, melted
7)Confectioners' sugar, for dusting
8)Whipped Cream , for serving ( I say vanilla Ice cream!!)
- Directions:
1)Preheat oven to 400 degrees. Generously butter 6 cups of a standard muffin tin (or 12 smaller cupcake pan - but again you'll have to reduce the timing). Dust with granulated sugar, and tap out excess. Set aside.
2)In the bowl of an electric mixer fitted with the paddle attachment, cream the butter and granulated sugar until fluffy. Add eggs one at a time, beating well after each addition. With the mixer on low speed, beat in flour and salt until just combined. Beat in chocolate until just combined. Divide batter evenly among prepared muffin cups.
3)Place muffin tin on a baking sheet; bake just until tops of the cakes no longer jiggle when the pan is lightly shaken, 8 to 10 minutes (less for mini ones around 5 -6 minutes). Remove from oven; let stand 10 minutes.

4)To serve, turn out cakes, and place on serving plates, bottom sides up. Dust with confectioners' sugar, and serve with whipped cream (Or vanilla ice cream), if desired (Trust me you will desire it once you break into the yummy warm luscious lava cake and the chocolaty goodness oozes out).

Monday, July 14, 2008

Best Cheesecake EVER. Period.


Okay guys anyone who dares disagree will not be getting a slice of this OMG and I mean OMG delicious cheesecake! When eating this you will imagine yourself on a cloud with lots of angels floating around then suddenly it will dawn on you that you have just gobbled three slices of this uber delicious creamy ..creamy .angelic .. (I'm out of adjectives but you get the picture , right?) cheesecake and will start cursing me because ... well let's put it this way - the cloud will no longer be able to hold you up! get it?! haha
This recipe is from an Australian website who prefer to weigh everything instead of using cups - but lucky for you I went through the trouble of converting everything into cups!
Caramel Honeycomb Cheesecake:
Ingredients:
Base:
1) 2 1/4 cups Graham crackers
2) 4 ½ tablespoon Butter

Caramel:
1) 1 ½ tablespoon Butter
2) ¼ cup Cream (35% to 40% fat)
3) ¼ cup Condensed milk
4) ¼ cup brown sugar
5) 1 tablespoon golden syrup

Filling:
1) 500g Cream cheese (Use the package to do the math - I got one 300g container and one 200g one - so that makes 500g, yea?)
2) 1/3 cup and 1 tablespoon Caster Sugar
3) 3 eggs
4) ½ cup sour cream
5) ½ cup thickened cream
6) 1 tablespoon lemon juice
7) 2 (50g) chocolate coated honeycomb bars (I used Cadbury's Crunchie)

Directions:
For the base:
1) Line a 20 cm (8 inch) Springform pan with baking paper.
2) Crush biscuits in a food processor. Add melted butter and mix to combine.
3) Press mixture over base of prepared pan.
4) Cover and refrigerate while preparing caramel and filling.

For the caramel:
1) Combine all ingredients in a small saucepan.
2) Simmer gently for 4 minutes, stirring occasionally.
3) Set aside to cool.

For the filling:
1) Preheat oven to 160 degrees Celsius
2) Beat cream cheese and sugar with an electric mixer or food processor until smooth. (Stop mixer occasionally to scrape down sides of bowl).
3) Add eggs and beat until combined. Add sour cream, cream and lemon juice. Beat just until all ingredients are combined.
4) Stir caramel thorough cheesecake mixture – it doesn't have to be completely mixed in. pour half of cheesecake mixture over the base. (The recipe says half but then the crushed honeycomb bars will float - like mine did - instead of remain at the bottom like they should - so by pouring just less then half you would end up with better results)
5) Crush honeycomb bars gently hitting unopened packets with the smooth side of a meat mallet.
6) Sprinkle crushed honey comb over the cheesecake mixture. Cover with remaining mixture.
7) Bake cheesecake for 1 hour and 15 minutes. Allow cheesecake to cool for 1 hour at room temperature. Store in the refrigerator.


My Cheesecake cracked at the top although it looked even more gorgeous because of it - but I've read that if you leave the cheesecake to rest in the oven for an hour before refrigerating this wont happen! But I didn't do that and it cracked so you might want to follow that strategy!

Saturday, July 12, 2008

Chocolate Spree – Chocolate Almond Torte


A couple of days ago I went grocery shopping with the 'rents (pathetic I know – don't rub it in!), and I spotted special offer on baking chocolate much to my utter delightment and I ended up buying 6 bars! So naturally the next baking assignment had to do with chocolate .. and lots of it! I came across this recipe while browsing this amazing website www.joyofbaking.com , while at school (it was a free period – honest!) and I had instantly fallen in love with the recipe but as it required cream of tartar and my then not so experienced self had no idea what cream of tartar was I saved the recipe hoping one day I'd be bold enough to try this wonderful torte! And as fate had planned I came across an article that stated it was absolutely O.K. to substitute cream of tartar with lemon juice or vinegar (for every 1/8 teaspoon of cream of tartar ¼ teaspoon of lemon juice or vinegar is required). And so I made it with high .. high hopes which and my patience was rewarded as this was seriously chocolaty and the almonds gave a wonderful taste and texture in the background.

The recipe:

Chocolate Almond Torte

    Ingredients:

1) 7 ounces (200 grams) bittersweet chocolate, chopped

2) 11 tablespoons (150 grams) unsalted butter, cut into small pieces

3) 3/4 cup (150 grams) granulated white sugar, divided

4) 4 large eggs, separated

5) 1/2 teaspoon pure vanilla extract

6) 1 cup (100 grams) finely ground almonds (Ground 1 cup of blanched or sliced toasted almonds in your food processor)

7) 1/4 teaspoon cream of tartar (or ½ teaspoon lemon juice or vinegar)

    Directions:

1) Preheat oven to 350 degrees F (177 degrees C) and place oven rack in the middle of the oven.

2) Place the sliced or blanched almonds on a baking sheet and toast in the oven for about 5-7 minutes or until lightly browned and fragrant. Remove from oven and let cool. Once completely cooled, place the nuts in a blender or small food processor and process until finely ground.

Note: The almonds need to be at room temperature before grinding to prevent them from clumping. If you find the almonds still clump when you ground them, add about 1 tablespoon (13 grams) of the sugar from the recipe. The sugar will help prevent clumping as it absorbs any oil exuded from the almonds.

3) Increase the oven temperature to 375 degrees F (190 degrees C) and line an 8 inch (20 cm) spring form pan with parchment paper. Set aside.

4) Separate the cold eggs, placing the egg yolks in one bowl and the egg whites in another. Cover with plastic wrap and let stand until they reach room temperature (about 30 minutes).

5) Melt the chopped chocolate and butter in a stainless steel bowl placed over a saucepan of simmering water. Once melted, remove from heat.

6) Meanwhile place the egg yolks and 1/2 cup (100 grams) granulated white sugar in the bowl of your electric mixer, fitted with the paddle attachment. Cream the yolks and sugar until pale and thick (about 2 to 3 minutes). Beat in the melted chocolate mixture and vanilla extract.

7) Fold in the ground almonds.

8) In a clean bowl, place the egg whites and whisk until foamy. Add the cream of tartar and continue whisking until soft peaks form. Gradually sprinkle in the remaining 1/4 cup (50 grams) sugar and whisk until stiff peak forms. Fold about 1/4 of the whites into the chocolate batter to lighten it. Quickly fold in the rest of the whites and mix only until incorporated.

9) Pour the batter into the prepared pan and bake for about 45 to 50 minutes or until a toothpick inserted in the center of the cake has a few moist crumbs.

10) Remove from oven and cool on a wire rack.

11) The cake will rise during baking but falls during cooling, leaving a crisp and cracked crust.

12) Once cool, run a spatula around the inside of the pan before releasing the sides.

13) If not serving immediately, cover and place in the refrigerator. Serve cold or at room temperature.

14) Dust with powdered (icing or confectioners) sugar, and serve with whipped cream.

P.s. I made this two days ago and its gone so this morning I got up super early (pilates – I think we've established that by now) and I made a caramel honeycomb cheesecake! Recipe to follow soon. The cheese cake is in the oven as we speak!:D


Monday, July 7, 2008

Maple Syrup Creme Brulee


Whenever making use of egg whites I am usually left with nice whole yellowy not so useful egg yolks. This was the case yesterday morning as well. Having watched Sarah Moulten of Sara's Secrets creme brulee recipe just recently, i decided to try making creme brulee for the very VERY first time! Initially I was very fearful of the eggs curdling as I've of it happening whenever I read or watch a Creme Brulee recipe. Fortunately luck (and talent) was on my side and this ill fate did not occur! I also adjusted the recipe to make it low fatter (who knew that was a choice with creme brulee?!?!), instead of using heavy cream i used evaporated milk. Anyway the recipe follows:
 Ingredients:
1) 2 cups evaporated milk(full fat)
2) 1/2 vanilla bean
3) 1 small egg
4) 3 large egg yolks
5) 7 tablespoons Grade B maple syrup
6) 4 tablespoons demarara sugar, for topping
7) 6 (4-ounce) brulee molds

 Directions:
1) Preheat the oven to 325 degrees F.
2) Pour the milk into a non-reactive saucepan and place over medium heat. While the milk is heating, slice the vanilla bean in half lengthwise, using a sharp paring knife. Separate the seeds from the skin by scraping the bean with the knife. Place the seeds and skin in the heating cream. Scald the milk by heating it until bubbles start to form around the edge of the pan. Remove from the heat.
3) In a large mixing bowl, whisk together the whole egg, egg yolks, and maple syrup until well blended. Continue to whisk while slowly pouring the hot milk into the egg mixture and whisk until the mixture is smooth and homogenous in color. Pour the mixture through a fine-mesh sieve to remove the vanilla bean pieces and overcooked eggs. Your next step will be made easier if you strain the mixture into a large measuring cup with a spout.
4) Place the molds on a baking sheet with 1-inch-high sides. Fill the molds half-full with the custard and set the sheet in the oven (it’s much easier to transfer the sheet with the molds only half-full).
5) Now, finish filling the molds to the top. It is important to fill the molds to the top, as the custard will lose volume as it bakes. Traditionally, creme brulee is baked in a hot water bath to insulate the custard from the direct heat of the oven and to keep the eggs from cooking too fast, which would cause them to separate. Using hot water from the tap, pour enough water into the baking sheet to reach halfway up the sides of the molds. If you are using a convection oven, however, a water bath is not needed because the even circulation of the air insulates the custard from the direct heat.
6) In either case, baking time is approximately the same, about 40 minutes. When baked correctly, the custard should tremble slightly when gently shaken. If you detect any liquid under the skin, the custard is under baked. Put them back in the oven and shake them every 5 minutes or so until they are ready.
7) Remove the molds from the water bath and place on a cooling rack for 30 minutes. Then refrigerate for 2 hours (or for to 3 days) before serving; the custards will finish setting in the refrigerator. Let the water bath cool before removing it from the oven.
8) Preheat the broiler.
9) If condensation occurs during chilling, carefully blot with a paper towel to remove moisture. Place the molds on a clean baking sheet. Sprinkle 2 teaspoons of the sugar over the top of the custards. It is important to spread the sugar evenly; if it is too thick or too thin in places, the caramelization will not be even across the top. When the broiler is hot, place the sheet about 4 inches under the broiler and broil until the sugar is caramelized. Keep a close eye on the creme brulee during broiling. They are finished when they are light brown. Place each mold on a small dessert plate and serve immediately.

Saturday, July 5, 2008

Caramelized Banana Crumble Top Pie - My Near Disaster!!


With the cheesecake nearly gone i decided to make a caramelized banana crumble top pie! I got the recipe from Saturday Kitchen (On BBC Food). It seemed quite simple until I started making it and everything started falling apart!
Firstly, the crust: I don't know why but it was just too soft, it was close to looking like a batter - Close. Even after putting it in the freezer for half an hour rolling it proved impossible - literally! it was waayyyy to sticky! So instead i put it in the pie dish and pressed it lightly with my fingers so that it covered the whole thing then i put it in the freezer for another half an hour.
Secondly; the filling: Caramelizing sugar has always been a challenge and this was only my second attempt at it - my first attempt .. well that's another story ( It involves burnt tongue, fingers and my lips looking like Angelina's! - Don't ask!). So anyway the sugar caramelized fine it was only when I added the butter, cream and tried coating the sliced banana's with the mixture did everything backfire! The sugar went all hard and stuck to the bottom. Although now that I think about it my mistakes are obvious - remove pan from heat when stirring in banana's this will definitely save you from wanting to stab yourself with the tongs (that are being used to handle the le banane).
So anyway the end result was OMG!! The pie tasted exellento and went marvelously with the chocolate sauce! My advice stick to the recipe trust the pie is totallly worth it!
Caramelized banana crumble top pie:
- Ingredients:
For the pastry:
1) 250g/9oz plain flour
2) 100g/3½oz unsalted butter
3) 100g/3½oz icing sugar
4) 2 medium eggs
5) 1 vanilla pod - cut and split or a teaspoon of vanilla extract
For the crumble:
1) 2 1/2 tablespoon /35g/1oz plain flour
2) 2 1/2 tablespoon /35g/1oz caster sugar
3) pinch of cinnamon
For the filling:
1) 5 bananas, sliced li
2) 12 tablespoons /180g/6oz butter
3) 12 tablespoons / 180g/6oz sugar
4) 6 tbsp cream
For the chocolate sauce:
1) 100ml/3½fl oz cream
2) 50g/1¾oz chocolate
- Directions:
1) Rub flour and butter together, add icing sugar.
2) Beat the eggs and vanilla seeds or extract and add to mix. Bring mix together and wrap in cling film. Put in freezer for half an hour.
3) After resting, roll out the pastry, line 20cm/8in tart ring, return to freezer for another half an hour then blind bake at 180C/360F/Gas 4 for 15-20 minutes.
4) In a hot non-stick pan, add the sugar and take to a caramel stage, add butter and allow to melt.
5) Add sliced bananas, add cream and coat bananas all over. Put mix in tart case (After removing from heat)!!.
6) Rub flour, castor sugar and cinnamon together and sprinkle on top.
7) Bake for ten minutes until golden.
8) Heat cream, take off heat and add chocolate.
9) Mix until chocolate melts.
10) Slice tart and drizzle the chocolate sauce around it.

Enjoy!

Friday, July 4, 2008

Triple Chocolate Cheesecake - O Nigella!


I saw this recipe of Nigella's sometime ago and it has been on my mind since then. So I finally I got an opportunity to make this oh so easy yet unbelievable delicious triple chocolate cheesecake. I mean its got chocolate three times I highly doubt it could taste bad. My dad - who has got incredible taste and i would blindly trust on any food related judgment - couldn't stop raving about the cake!
And since this was my first cheesecake ever - I couldn't be happier! :D
Honestly speaking, I did do one mistake, the recipe calls for 3/4 cups of sugar for the filling and I put only a half a cup and forgot the 1/4 cup, so it did taste a little less sweet and I'm sure the forgotten 1/4 cup would have made it le perfect!
Moral: don't accidentally 'under do' the sugar, or anything else as a matter of fact since this recipe honestly cannot be improved - although now that i think about it, a thicker crust would have been better as I'm more of a crust person. But Cheesecakes aren't supposed to be very crusty anyway - although I'm sure Nigella won't mind some small alterations *wink..wink*!
Okay so the recipe is as follows:
Triple Chocolate Cheesecake:
 Ingredients:
Cheesecake base:
1) 1 1/3 cups graham cracker crumbs
2) 1/2 stick butter
3) 1 tablespoon cocoa
Cheesecake filling:
1) 6 ounces bittersweet or semisweet chocolate, chopped small
2) 2 1/2 cups cream cheese
3) 3/4 cup superfine sugar
4) 1 tablespoon custard powder
5) 3 large eggs
6) 3 large egg yolks
7) 2/3 cup sour cream
8) 1/2 teaspoon cocoa, dissolved in 1 tablespoon hot water
Sauce:
1) 3 ounces bittersweet chocolate, finely chopped
2) 1/2 cup heavy cream
3) 1 teaspoon dark corn syrup
Special equipment: 9-inch springform pan

 Directions:
1) Preheat the oven to 350 degrees F.
2) To make the base, process the graham crackers to make rough crumbs and then add the butter and cocoa. Process again until it makes damp, clumping crumbs and then tip them into the pan. Press the crumbs into the bottom of the pan to make an even base and put into the freezer while you make the filling.
3) Put a kettle on to boil.
4) Melt the chocolate either in a microwave or double boiler, and set aside to cool slightly.
5) Beat the cream cheese to soften it, then add the sugar and custard power, beating again to combine. Beat in the whole eggs and then the yolks, and the sour cream. Finally add the cocoa dissolved in hot water and melted chocolate and mix to a smooth batter.
6) Take the springform tin out of the freezer and line the outside of the tin with a good layer of cling wrap, and then another layer of strong foil over that. This will protect it from the water bath.
7) Sit the springform tin in a roasting pan and pour in the cheesecake filling. Fill the roasting pan with just boiled water to come about half way up the cake tin and bake in the oven for 45 minutes to 1 hour. The top of the cheesecake should be set, but the underneath should still have a wobble to it.
8) Peel away the foil and cling film wrapping and sit the cheesecake in its tin on a rack to cool. Put in the refrigerator once it is no longer hot, and leave to set, covered with plastic overnight. Let it lose its chill before unspringing the cheesecake to serve.
To make the chocolate sauce: very gently melt the chopped chocolate, cream and syrup. When the chocolate has nearly melted, take off the heat and whisk it to a smooth sauce. Let it cool a little, and pour it over the chocolate cheesecake on its serving plate.

Tuesday, July 1, 2008

Mocha Chocolate Cake - For my Lovely Mother's Birthday


Hello everyone, i hadn't baked anything in a couple of days as i was waiting to bake for my mom's birthday. Originally i had planned to bake an opera cake but it turned out that the opera cake would be too ginormous for the family so i ended up making a mocha chocolate cake. The recipe for the cake is from Dorie Greenspan book, but i got the recipe from a blog as i don't have the book yet - unfortunate i know! The original recipe has different icing but i opted to make a chocolate mocha fudge icing (adapted from different sources), Which turned out nothing short of heavenly! The cakes texture was so soft and airy as it had oil and buttermilk, so the cake ain't that heavy on your sides either! I made the cake yesterday morning at the crack of dawn (literally - since i wake up early to do pilates anyway!) and hid it in me aunts room so that my mom doesn't spot it but I'm guessing she figured it out since the house was smelling gloriously of chocolate and coffee. But she pretended not to know anything about it! So this morning I've been up early (for pilates) and to put the icing on my lovely. I also made pancakes and banana smoothie for my moms breakfast "buffet". I didn't have much time for the pancakes so i just went with Bisquick - but i come across a recipe for whole grain pancakes which i intend to try out later and if it turns out to be a success I'll definitely post it!

The naked cake (ie before frosting):

Anyway enough blabbing .. the recipe:

Mocha Chocolate Cake

 Ingredients:

1)1-3/4 cups all-purpose flour

2)2 cups sugar

3)3/4 cup good cocoa powder

4)2 tsp baking soda

5)1 tsp baking powder

6)1 tsp kosher salt

7)1 cup buttermilk, shaken

8)1/2 cup vegetable oil

9)2 extra-large eggs, at room temperature

10)1 tsp pure vanilla extract

11)1 cup freshly brewed hot coffee


Directions:

1)Preheat the oven to 350 deg. F. Butter two 9-inch round cake pans, line them with parchment paper, then butter and flour them.

2)Sift flour, sugar, cocoa, baking soda, baking powder, and salt into the bowl of an electric mixer. In another bowl, combine the buttermilk, oil, eggs, and vanilla. With the mixer on low speed, slowly add the wet ingredients to the dry. With the mixer still on low, add the coffee and stir just to combine, scraping the bottom of the bowl with a rubber spatula. Pour the batter into the prepared pans and bake for 35 to 40 minutes, until a cake tester comes out clean.

3)Set the pans on a cooling rack and cool in the pans for 30 minutes. Loosen the edges by running a knife around the inside, if needed, turn the cake onto a plate, peel the parchment paper off the bottom, then turn the cake onto a cooling rack to finish cooling.

4)When the layers are completely cooled, place one layer, flat side up, on a flat plate or cake pedestal. With a knife or offset spatula, spread the top with frosting. Place the second layer on top, rounded side up, and spread the frosting evenly on the top and sides of the cake.

Mocha Chocolate Icing: ( i cut the recipe in half)
12 oz Semi Sweet chocolate chips.
8 oz sour cream
1/2 cup butter
4 1/2 cups sifted icing sugar
2 teaspoon coffee

Melt the chocolate and butter in a small saucepan over low heat. Remove from heat and let cool for 10 minutes stir in sour cream and sifted powdered sugar. Enjoy!