Tuesday, December 30, 2008
I have moved!
I have moved.
To a new domain, i.e.
Please do visit :D :
http://bakinghaven.wordpress.com/
See ya there :D
Friday, November 21, 2008
Apologies.. :(
I would like to sincerely apologise for lack no updates since september. But I have an honest explanation.. i do .. i do.
I just started my first year of University and well you guessed it I have been extrmly busy plus I have NO KITCHEN. If you count the shared kitchen then yeah but dude I refuse to use it .. unless the need is too great .. like this once..
So I'm in malaysia right not and i have access to the greatest fruits and vegetables imaginable and i cant really cook anythng because i dont have a ktichen (as previously stated) and i dont have any utencils :'(
Anyway, I was out grocery shopping and I come across black rice, I have heard about it but never actually seen it (you where i live and stuff) so i bought it immedialty and finally after months of no cooking went to the shared kitchen and boiled rice.
What did I have with the rice, if your wondering.. nothing. well i did have celery and some arabic pickles that i got but yea .. I cant afford the luxury of having something to go with rice, I mean why can't rice not be eaten by itself?!
When I cooked the rice, it turned purple!! yes my friends you read this correctly -- it turned PURPLE! So now i call it purple rice! :)
It had this very nutty flavour, so unlike the regular boring rice. Thus it could be eaten by itself. :D
It doesn't require any recipe just soak it for 4 hours or so (I soaked it overnight - so much more efficient) and then boiled with a pinch of salt for approximately 45 minutes.
ze lovely pictors:
Saturday, September 13, 2008
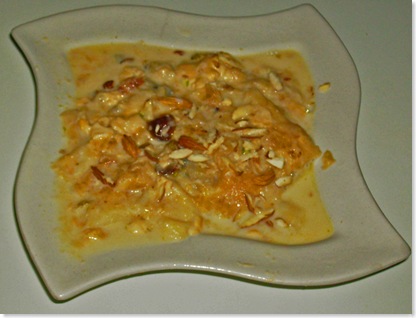
Um Ali
Um Ali is a traditional Arabic dessert dish and is very very rich made almost on every special occasion. Its basically a sort of bread pudding and is one of my all time favourite desserts (and being such a huge food lover categorizing something as my favourite is a big deal!!).
Um Ali translates to Ali's mother (which Ali - that's yet to be discovered..). Despite this dish being extremely..extremely.. unbelievably delicious and easy to make, restaurants over here rarely get it right - something always seems to be off, only at times have I tasted one that was just perfect!
So finely I decided how unclever of me .. here I am baking all sorts of fancy stuff and the one thing that I absolutely am in love with I have NEVER made or even considered making!
For the recipe I went to the one person that can totally kick Martha Stewart a$$ (comment not meant to be mean spirited) - My aunt! I got the recipe made some amendments and voila - Um Ali as it should be! :D
Um Ali
- Ingredients:
1) 250g Puff Pastry
2) 1/2 cup raisins and dates (chopped and seeded)
3) 1/2 cup coarsely chopped of your favorite nuts (I used pistachios and almonds)
4) ½ cup sugar
5) 1 Tablespoon rose water
6) 1 teaspoon vanilla extract
7) 3 cups whole milk
8) 1/2 cup heavy cream
§ Directions:
1) Preheat the oven to 350F. Lightly butter a 1-qt (2L) baking dish.
2) place the puff pastry sheets in the oven for around 15 minutes until golden brown. Remove from the oven and let cool so you can handle them with your hands. Break the puff pastry into small squares and arrange half the pastry in the buttered baking dish sprinkle with chopped dates and raisons and nuts. Do the same for the remaining half and set aside.
3) Bring the milk and sugar to a boil, whisking occasionally. Whisk in the rose water and vanilla extract. Pour the mixture over the puff pastry. making sure everything is covered.
4) Top with heavy cream and bake for 20 - 25 minutes until the top is golden brown.
5) Remove from oven and let sit for 10 minutes,garnish with chopped nuts. Serve warm.
Thursday, September 11, 2008
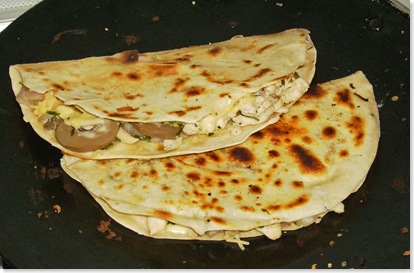
Chicken and Mushroom Quesadillas with home made tortillas
I've always wanted to make my own whole wheat flour tortillas but was never able to find the right recipe - they always seemed to be lacking something - well not anymore, because I have found the recipe for the perfect (If there exists such a thing) whole wheat flour tortillas!
Also the above quesadilla's where a big hit with my family specially my brothers who tend to be very picky eaters and don't do foreign. I mean even if its something simple like rosemary scented oven grilled fries they will refuse to look at them (if they found out that they are rosemary scented oven grilled potatoes), unless I tell them its plain ol' french fries then they will gobble them down - you get me , right?
Chicken and mushroom Quesailla's
- Ingredients:
- 2 Tablespoon olive oil
- 1 teaspoons chili powder
- 1 garlic cloves, minced
- 1 teaspoon dried oregano
- 2 ounces fresh shiitake mushrooms, stemmed, sliced
- 2 ounces button mushrooms, sliced
- 1 cups shredded cooked chicken
- 1 small finely chopped onion
- 1/3 cup chopped fresh cilantro
- 2 1/2 cups grated cheddar and masadam Cheese (masadam is one of my all time favourite cheeses - along with parmesan, gorgonzola, goat, cheddar, mozzarella, feta... the list will go on for several pages but I hope you get the picture!)
- Olive oil (to brush)
- 4 (around 8 inch diameter) home made tortillas (recipe follows)
- Directions:
Heat olive oil over medium-high heat. Add chili powder, garlic and oregano. Sauté until fragrant, about 1 minute. Add shiitake and button mushrooms and sauté until tender, about 5 minutes then add onions and saute for a further 5 minutes. Remove from heat. Mix in chicken and cilantro. Cool 10 minutes. Mix in cheese. Season with salt and pepper. (Can be made 8 hours ahead. Cover and chill.)
Heat a dry iron skillet.Lightly brush oil on 1 side of tortillas. Place tortillas, oil side down on skillet (one by one). Put the chicken mixture on the tortilla, spreading to even thickness. Let it sit on the skillet until slightly colored, fold the tortilla in half and cook both sides until golden brown. Do the same for the remaining tortillas. Cut into wedges. serve and enjoy.
note: I put jalapenoes in mine! You may do the same!
Whole Wheat flour tortillas
Adapted from homesick texans blog, you will need half this recipe for the quesadillas
§ Ingredients:
1) 2 cups of all-purpose flour (can make them whole wheat by substituting one cup of whole-wheat flour for white flour)
2) 1 1/2 teaspoons of baking powder
3) 1 teaspoon of salt
4) 2 teaspoons of vegetable oil
5) 3/4 cups of warm milk
§ Directions:
1) Mix together the flour, baking powder, salt and oil.
2) Slowly add the warm milk.
3) Stir until a loose, sticky ball is formed.
4) Knead for two minutes on a floured surface. Dough should be firm and soft.
Place dough in a bowl and cover with a damp cloth or plastic wrap for 20 minutes.
5) After the dough has rested, break off eight sections, roll them into balls in your hands, place on a plate (make sure they aren’t touching) and then cover balls with damp cloth or plastic wrap for 10 minutes. (It’s very important to let the dough rest, otherwise it will be like elastic and won’t roll out to a proper thickness and shape.)
6) After dough has rested, one at a time place a dough ball on a floured surface, pat it out into a four-inch circle, and then roll with a rolling pin from the center until it’s thin and about eight inches in diameter. (If you roll out pie crusts you’ll have no problem with this.) Don’t over work the dough, or it’ll be stiff. Keep rolled-out tortillas covered until ready to cook.
If not making Quesadillas then:
In a dry iron skillet or comal heated on high, cook the tortilla about thirty seconds on each side. It should start to puff a bit when it’s done.
Wednesday, September 10, 2008
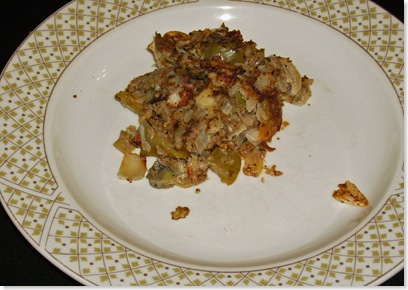
Eggplant and green pepper kugel
A kugel? you may have not heard of it, I hadn't either until I came upon it day before yesterday on www.myrecipes.com .
Traditionally a kugel is made either with potatoes or noodles but this one uses matzo meal (you can substitute this with regular breadcrumbs - I used whole wheat ones that I made at home).
This dish kinda reminded me of a quiche, and it was very delicious and well accepted - the leftovers I used them the next day as filling in puff pastry (very clever if I may add).
Eggplant and green pepper kugel
- Ingredients:
- 1 large eggplant (about 2 pounds)
- 2 teaspoons vegetable oil
- 3 cups finely chopped onion
- 1 1/2 cups finely chopped green bell pepper
- 3 tablespoons pine nuts
- 1 1/2 teaspoons salt
- 1/2 teaspoon freshly ground black pepper
- 2 large eggs, lightly beaten
- 3/4 cup matzo meal
- Cooking spray
- 1 teaspoon paprika
- Directions:
- Preheat oven to 450°.
- Pierce eggplant several times with a fork; place on a foil-lined baking sheet. Bake at 450° for 20 minutes or until tender. Cool slightly; peel and chop. Place in a large bowl.
- Heat the oil in a large nonstick skillet over medium-high heat. Add onion, bell pepper, and nuts. Cook 6 minutes or until onion is tender. Add onion mixture, salt, black pepper, and eggs to eggplant; stir well to combine. Add matzo meal; toss gently to combine. Spoon mixture into an 11 x 7-inch baking dish coated with cooking spray. Sprinkle with paprika. Bake at 450° for 35 minutes or until pudding is thoroughly heated and golden brown.
Tuesday, September 9, 2008
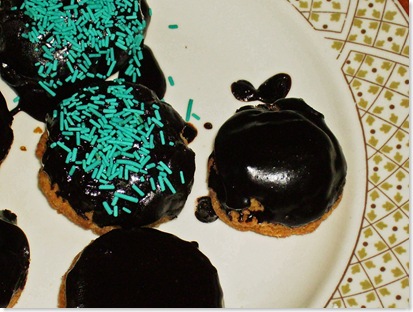
Deep fried and smothered in chocolate!
Ever since I saw the post at joy the bakers blog regarding doughnuts, I've had an urge to make them. So a couple of days ago I went to her post to get the recipe but found out that The dough had to sit for around 8 hours as it had yeast and I was in no mood to wait 8 hours - I googled quick and easy doughnuts and ended up with this recipe.
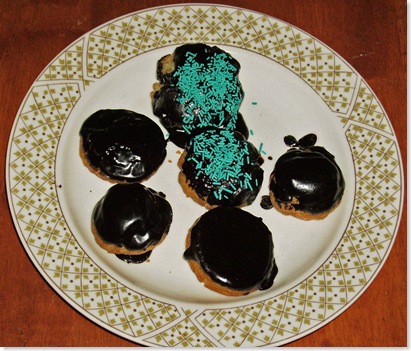
Before I initiate my ramblings view on these cuties, I have to tell you about the title of this post - deep fried and smothered in chocolate, does it ring a bell? no? how about when I say its from a movie with a green ogre? well okay maybe I'm the only person who has watched shrek trilogy till all the lyrics, lines and scenes are embedded in my head! So the evil fairy godmother says this in the 2nd movie right after shrek, donkey and cat wreck her factory! And I've always wanted to use this line - and now I have! Thank you.
Okay so when you eat these doughnut balls ( that's what I made) don't be thinking about dunkin' doughnuts , alright?! Moving on to the positive - these are not your typical doughnuts (i.e. light and airy) but they are more like cake doughnuts (which I am a big fan of by the way)!And they can certainly, definitely fix any doughnut craving instantly! Moreover if you have kids, you will be making these regularly ( My little bro he's 8yrs old loved them! Totally Off topic: Today was his first day in fourth grade he looked sooo adorable in his combed out hair and neatly pressed uniform! I should have taken a picture!!)
Cake Doughnuts
- Ingredients:
1) ¼ cup Buttermilk
2) 2 tablespoons shortening
3) 1/2 cup white sugar
4) 1 egg
5) 1/2 teaspoon vanilla extract
6) 2 cups sifted all-purpose flour
7) 1/2 teaspoon baking soda
8) 1/4 teaspoon salt
9) 1 quart oil for deep frying
10) 1/2 cup confectioners' sugar for dusting
- Directions:
1) In a medium bowl, cream together the shortening and sugar until smooth. Beat in the egg and vanilla until well blended. Sift together the flour, baking soda, and salt; stir into the sugar mixture alternating with the vinegar and milk. Roll dough out on a floured surface to 1/3 inch thickness. Cut into doughnuts using a donut cutter. Let stand for about 10 minutes.
3) Heat the oil in a large deep skillet to 375 degrees F (190 degrees C). Fry doughnuts in the hot oil until golden, turning over once. Drain on paper towels. Dust with confectioners' sugar while they are still warm, and serve immediately. (I dipped mine in chocolate icing and put blue sprinkiles on them!)
Monday, September 8, 2008
Chocolate Pistachio Biscotti - 2 go!
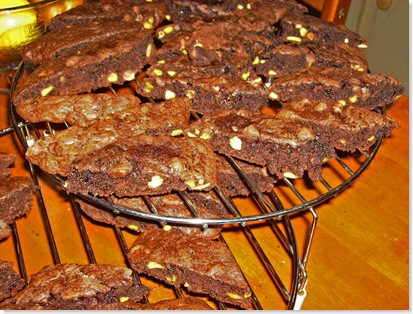
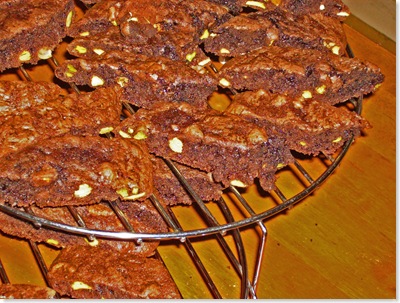
So let me start by enlightening my dear readers with the ' 2 go ' next to the title of this post. Basically I made these Oh my gawd delicious biscotti to take with me in an airtight container to university. Weird - I know, but since I don't really do store bought cookies I thought this will be a good alternative - till it lasts.
The recipe adapted from www.joyofbaking.com actually called for hazelnuts but my nut of the moment has been pistachio lately so I opted for them instead.
Chocolate Pistachio Biscotti
- Ingredients:
1) 4 ounces (125 grams) semisweet or bittersweet chocolate, coarsely chopped
2) 1 cup (215 grams) firmly packed light brown sugar
3) 1 3/4 (250 grams) cups all-purpose flour
4) 1/3 cup (30 grams) unsweetened cocoa, preferably Dutch-processed
5) 1 tablespoon (4 grams) instant espresso powder
6) 1 teaspoon (5 grams) baking soda
7) 1/4 teaspoon salt
8) 3 large eggs
9) 1 1/2 teaspoons (6 grams) pure vanilla extract
10) 1 cup (150 grams) Pistachios, toasted.
- Directions:
1) Preheat oven to 350 degrees F (180 degrees C). To toast Pistachios: spread on a baking sheet and bake for 15 minutes.Cool. Set aside while you prepare the dough.
2) Reduce temperature of oven to 300 degree F (150 degrees C). Line a large baking sheet with parchment paper.
3) In a food processor fitted with a metal blade, combine the coarsely chopped chocolate and brown sugar and process until the chocolate is very fine; set aside.
4) Sift or whisk together the flour, cocoa, espresso powder, baking soda and salt into a bowl; set aside. In the bowl of your electric mixer combine the eggs and vanilla extract and beat to blend, about 30 seconds. On low speed mix in the chocolate/sugar and flour mixtures until a stiff dough forms, adding the pistachios about half way through mixing.
5) Divide the dough in half. Transfer to the baking sheet and drop the dough in the shape of a log using spatula , spacing them well apart (width-wise on the pan), and pat to even the shapes. Bake until almost firm to the touch, about 35 - 40 minutes (logs will spread during baking). Remove from the oven, place on wire rack, and let cool for 10 minutes.
6) Using a long spatula transfer the logs to a cutting board. Using a serrated knife cut the dough into slices 3/4 inch (2 cm) thick on the diagonal. Arrange the slices cut-side down on the baking sheet. Bake 15 minutes. Turn the slices over and bake until crisp and dry, about 15 minutes longer. Remove from oven and let cool on wire rack.

